
This is a typical documentation post on how to set up a stack of open source tools to create a media center at home. That involves not just the frontend, that you can use on your TV or other devices, but also the tools needed for monitoring the release of certain movies and tv shows.
By the time you reach the end of the post and look at the code you will be wondering "is it worth the time?". I had the same reservations when I started looking to all these tools and it's definitely something to consider. But they do simplify a lot of the tasks that you probably do manually now. And in the end, you get an interface that has a similar user experience as many commercial streaming services do.
To minimize the effort of installing all this software and reducing future maintenance, you can use docker containers. The linuxserver.io project has done some amazing work on this area, providing pre-built container images. They definitely worth your support if you can afford donating.
Stack
- Movies: Radarr
- TV Shows: Sonarr
- Torrents: Transmission. This is probably the only part of the whole stack that you have the flexibility to choose between various options.
- Indexer: Jackett. That works as a proxy that translates queries from all the other apps into torrent trackers http queries, parses the html or json response, and then sends results back to the requesting software (Transmission in this case).
- Subtitles: Bazarr
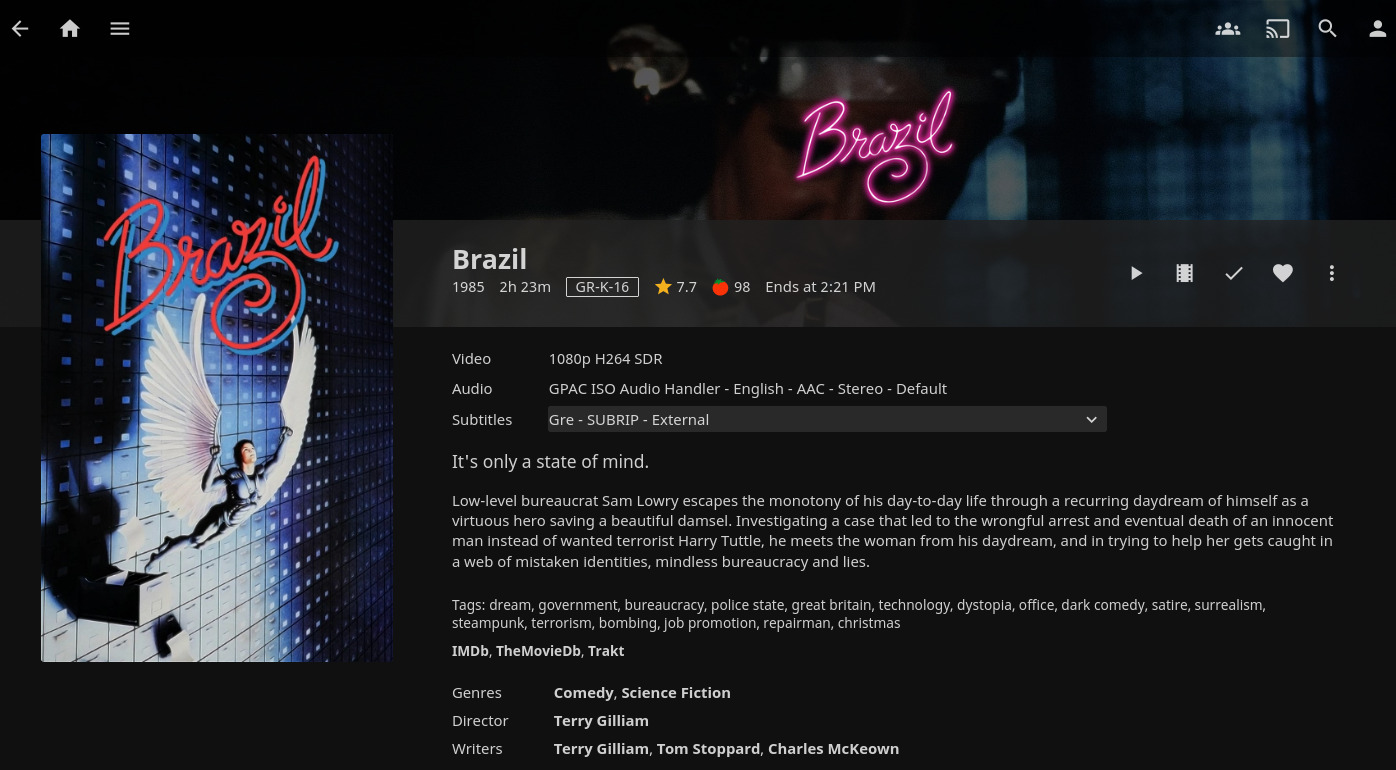
- Media Center: Jellyfin
Docker Compose
Below I include a docker compose file that will make everything work together. Some prerequisites that you need to take care of:
- Create a new user that would be the one running these docker containers.
- Depending on your Linux distribution, you many need to add this user to the
dockergroup. - Switch to that use and run
id. Use the numeric values fromuidandguidto replace the values forPUIDandPGIDrespectively in the compose file below. - All containers need to share a volume for all the media (see the
volumesconfiguration at the bottom of the file). Hardlinks are being used then to avoid duplicating files or doing unnecessary file transfers. For a more detailed explanation see Radarr's documentation. - If you live in a country that censors Torrent trackers, you need to override DNS settings at least for the Jackett service. The example below is using RadicalDNS for that purpose.
- Adjust the volume paths to your preference. The example is using
/datafor configuration directories per app and/data/publicfor the actual media. - Save this file as
docker-compose.yml.
version: "3.7"

services:
  transmission:
    image: lscr.io/linuxserver/transmission:latest
    container_name: transmission
    environment:
      - PUID=1000
      - PGID=1000
      - TZ=Etc/UTC
      - UMASK=002
      - USER= #optional
      - PASS= #optional
    volumes:
      - /data/transmission:/config
      - data:/data
    ports:
      - 9091:9091
      - 51413:51413
      - 51413:51413/udp
    restart: unless-stopped

  sonarr:
    image: lscr.io/linuxserver/sonarr:latest
    container_name: sonarr
    environment:
      - PUID=1000
      - PGID=1000
      - TZ=Etc/UTC
      - UMASK=002
    volumes:
      - /data/sonarr:/config
      - data:/data
    ports:
      - 8989:8989
    restart: unless-stopped

  radarr:
    image: lscr.io/linuxserver/radarr:latest
    container_name: radarr
    environment:
      - PUID=1000
      - PGID=1000
      - TZ=Etc/UTC
      - UMASK=002
    volumes:
      - /data/radarr:/config
      - data:/data
    ports:
      - 7878:7878
    restart: unless-stopped

  jackett:
    image: lscr.io/linuxserver/jackett:latest
    container_name: jackett
    environment:
      - PUID=1000
      - PGID=1000
      - TZ=Etc/UTC
      - UMASK=022
    dns:
      - 88.198.92.222
    volumes:
      - /data/jackett:/config
      - data:/data
    ports:
      - 9117:9117
    restart: unless-stopped

  bazarr:
    image: lscr.io/linuxserver/bazarr:latest
    container_name: bazarr
    environment:
      - PUID=1000
      - PGID=1000
      - TZ=Etc/UTC
      - UMASK=022
    volumes:
      - /data/bazarr:/config
      - data:/data
    ports:
      - 6767:6767
    restart: unless-stopped

  jellyfin:
    image: lscr.io/linuxserver/jellyfin:latest
    container_name: jellyfin
    environment:
      - PUID=1000
      - PGID=1000
      - TZ=Etc/UTC
      - UMASK=022
      - JELLYFIN_PublishedServerUrl= #optional
    volumes:
      - /data/jellyfin:/config
      - data:/data
    ports:
      - 8096:8096
    restart: unless-stopped

volumes:
  data:
    driver: local
    driver_opts:
      type: none
      device: /data/public
      o: bind
Nginx
To make it easier accessing all those services Nginx can be used to map ports exposed by docker under the same domain. You can of course just use your server's IP address, but having a domain name can also make it easier for other people who are not as good as you in memorizing IP addresses (I know right?).
Although it may not considered a good practice to point an external domain to an internal IP, it be very convenient in this use case since it allows you to issue a valid and free SSL certificate using Let's Encrypt.
Below is a simple Nginx configuration that can work together with the docker compose setup described above.
upstream transmission {
  server 127.0.0.1:9091;
  keepalive 4;
}

upstream sonarr {
  server 127.0.0.1:8989;
  keepalive 4;
}

upstream radarr {
  server 127.0.0.1:7878;
  keepalive 4;
}

upstream jackett {
  server 127.0.0.1:9117;
  keepalive 4;
}

upstream bazarr {
  server 127.0.0.1:6767;
  keepalive 4;
}

upstream jellyfin {
  server 127.0.0.1:8096;
  keepalive 4;
}

server {
  listen 80;
  listen [::]:80;
  server_name media.example.com;
  return 301 https://$server_name$request_uri;
}

server {
  listen 443 ssl http2;
  listen [::]:443 ssl http2;
  server_name media.example.com;

  ssl_certificate "/etc/certs/acme/fullchain.cer";
  ssl_certificate_key "/etc/certs/acme/media.example.com.key";

  location /radarr {
    include /etc/nginx/snippets/proxy_pass.conf;
    proxy_pass http://radarr;
  }

  location /sonarr {
    include /etc/nginx/snippets/proxy_pass.conf;
    proxy_pass http://sonarr;
  }

    location /jackett {
    include /etc/nginx/snippets/proxy_pass.conf;
    proxy_pass http://jackett;
  }

  location /bazarr {
    include /etc/nginx/snippets/proxy_pass.conf;
    proxy_pass http://bazarr;
  }

  location /transmission {
    include /etc/nginx/snippets/proxy_pass.conf;
    proxy_pass_header X-Transmission-Session-Id;
    proxy_pass http://transmission;
  }

  location / {
    include /etc/nginx/snippets/proxy_pass.conf;
    proxy_pass http://jellyfin;
  }
}
Some things to take care of:
- Replace the
media.example.comserver name with yours. - With the exception of Jellyfin, all other services are served from a path. You may need to adjust the application settings after first run to make this work. As an example, Radarr will need a
<UrlBase>/radarr</UrlBase>at itsconfig.xml. - Since
proxy_passoptions are the same for all services, there is an include directive pointing to the snippet below.
proxy_set_header Host $host;
proxy_set_header X-Forwarded-For $proxy_add_x_forwarded_for;
proxy_set_header X-Forwarded-Host $host;
proxy_set_header X-Forwarded-Proto $scheme;
proxy_redirect off;
proxy_http_version 1.1;
proxy_set_header Upgrade $http_upgrade;
proxy_set_header Connection $http_connection;
Certificates
Since the subdomain will be pointing to an internal IP it can be difficult to use the http challenge to get a certificate. Instead, you can use acme.sh that supports many DNS providers and can automate the DNS challenge verification.
Here is an example command for issuing a certificate for the first time, using Cloudflare DNS:
acme.sh --debug --issue --dns dns_cf -d media.example.com --dnssleep 300
You will need to make that Nginx configuration points to the certificates created by acme.sh.
Run it!
All you have to do is bring docker containers up. Switch to the user you created for that purpose and
go to the directory you saved docker-compose.yml:
docker-compose up -d
As root you should also start Nginx:
systemctl enable --now nginx.service
And that's it!
Configuration
Some post-installation configuration to make everything work together:
- As mentioned above, make sure to adjust "URL base" and use the location path configured in Nginx (eg.
/sonarrfor Sonarr) in all the applications. - Whatever torrent client you choose, make sure to configure it for both Radarr and Sonarr as a Download Client under their Settings options.
- On Transmission, you can choose "Require Encryption" in Preferences > Peers > Encryption mode. You will probably lose some peers, but you'll prevent your ISP from knowing what content you are downloading.
- After you add some torrent trackers to Jackett, you would also need to configure Indexers under Settings options in both Sonarr and Radarr. You should copy the Torznab feed from Jackett and its API key to make it work.
- For subtitles, you need first to add some Providers in Bazarr Settings options. And then create at least one Language Profile under Languages, so that Bazarr knows what languages to look for.
- Both Sonarr and Radarr support importing existing media files and they provide some on-screen instructions on how to structure your files in a way they understand.
Future maintainance
Upgrading the whole stack is just two commands:
docker-compose pull
docker-compose restart
You can also make a systemd service to run the docker containers on boot.
It also helps if you want to check logs and you are familiar with journald.
Here is a simple service file:
[Unit]
Description=Media Center

[Service]
RemainAfterExit=yes
User=username
Group=group
WorkingDirectory=/home/username/
ExecStart=docker-compose up -d
ExecReload=docker-compose restart
ExecStop=docker-compose stop
Restart=always
- Make sure to replace
usernameandgroupwith your settings. - Create this file inside
/etc/systemd/system/
Reload systemd to view the new service file and run and activate the service:
systemctl daemon-reload
systemctl enable --now mediacenter.service
Enjoy!
Comments and reactions on Fediverse.